Did you know that radon is the leading cause of lung cancer among non-smokers, responsible for approximately 21,000 deaths in the United States each year? If you’re concerned about radon levels in your home and also need to replace your sump pump, this article is for you. In this guide, we will provide you with step-by-step instructions on how to replace your sump pump with a radon mitigation system, ensuring a safer and healthier living environment for you and your loved ones.
Key Takeaways
- Conduct radon testing using professional-grade equipment for accurate results
- Consult with a qualified radon professional to choose the appropriate radon mitigation system based on the type of foundation in your home
- Gather the necessary tools and materials beforehand to streamline the installation process
- Regularly test and monitor radon levels to ensure a safe and healthy living environment, determine the effectiveness of the mitigation system, and address concerns such as, ‘Is sump pump smell toxic?
Assessing Radon Levels in Your Home
To accurately assess radon levels in your home, begin by conducting a radon testing process using professional-grade equipment. Radon is a colorless and odorless gas that can seep into homes through cracks in the foundation, walls, and floors. It is a radioactive gas that is naturally present in the soil and can pose a significant health risk if levels are too high. Professional-grade radon testing equipment is recommended to ensure accurate results. These devices measure the concentration of radon gas in the air and provide precise readings. The testing process involves placing the equipment in various areas of the home, including basements, crawl spaces, and living areas, for a specific duration. It is essential to follow the instructions provided by the equipment manufacturer to obtain reliable and valid results. By conducting a radon testing process using professional-grade equipment, homeowners can identify if further radon mitigation measures are necessary to ensure a safe and healthy living environment.
Choosing a Radon Mitigation System

What factors should be considered when selecting a radon mitigation system? When choosing a radon mitigation system, several factors need to be taken into consideration to ensure its effectiveness and efficiency. Firstly, the type of foundation in the home plays a crucial role in determining the appropriate mitigation method. For example, if the house has a basement or crawl space, a sub-slab depressurization system may be required, while a sub-membrane depressurization system may be more suitable for homes with a concrete slab foundation. Additionally, the size and layout of the property, as well as the radon levels measured, must be considered. It is essential to consult with a qualified radon professional who can assess the specific conditions of the home and recommend the most appropriate mitigation system to ensure effective radon reduction.
Gathering the Necessary Tools and Materials
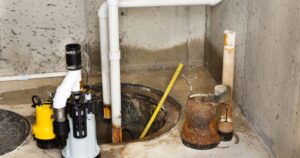
Before beginning the process of replacing a sump pump with radon mitigation, it is crucial to gather the necessary tools and materials. Ensuring you have all the required items at hand will help streamline the installation process and minimize delays. The tools and materials needed for this task include a new radon mitigation system, a sump pump cover or lid, PVC pipes, couplings, elbows, a radon fan, a drill with appropriate bits, a utility knife, a caulking gun, and a measuring tape. Additionally, it is important to have safety equipment such as gloves and safety goggles to protect yourself during the installation process. By gathering these tools and materials beforehand, you can proceed with confidence and efficiency in replacing the sump pump with radon mitigation.
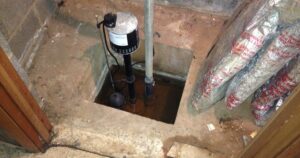
Shutting off and Removing the Existing Sump Pump
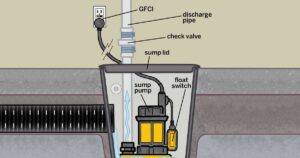
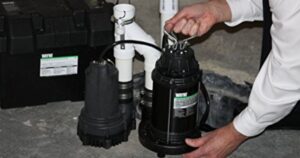
To begin the process of shutting off and removing the existing sump pump, take the following steps. First, locate the circuit breaker that controls the power supply to the sump pump and turn it off. This will ensure that there is no electrical current running through the pump during the removal process. Next, disconnect the power cord from the electrical outlet to completely cut off power to the pump. Once the power is disabled, locate the discharge pipe connected to the sump pump and remove it carefully. Use a wrench to loosen the clamps that secure the pipe and gently pull it away from the pump. Finally, disconnect the pump from the sump pit by removing any bolts or screws that hold it in place. With these steps completed, the existing sump pump is now ready to be replaced with a radon mitigation system for a safer and healthier environment.
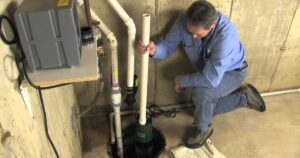
Installing the Radon Mitigation System
To begin the installation of the radon mitigation system, gather all the necessary materials and tools. You will need a fan, PVC pipes, couplings, elbows, a manometer, and a drill with appropriate bits. Start by locating a suitable location for the fan outside the house, preferably on the roof or exterior wall. Next, drill a hole through the foundation to create an entry point for the PVC pipe. Connect the pipe to the hole using couplings and elbows, ensuring a secure fit. Install the fan at the designated location and connect it to the PVC pipe. Finally, attach the manometer to monitor the system’s pressure. With the radon mitigation system installed, it is now time to move on to connecting it to your drainage system.
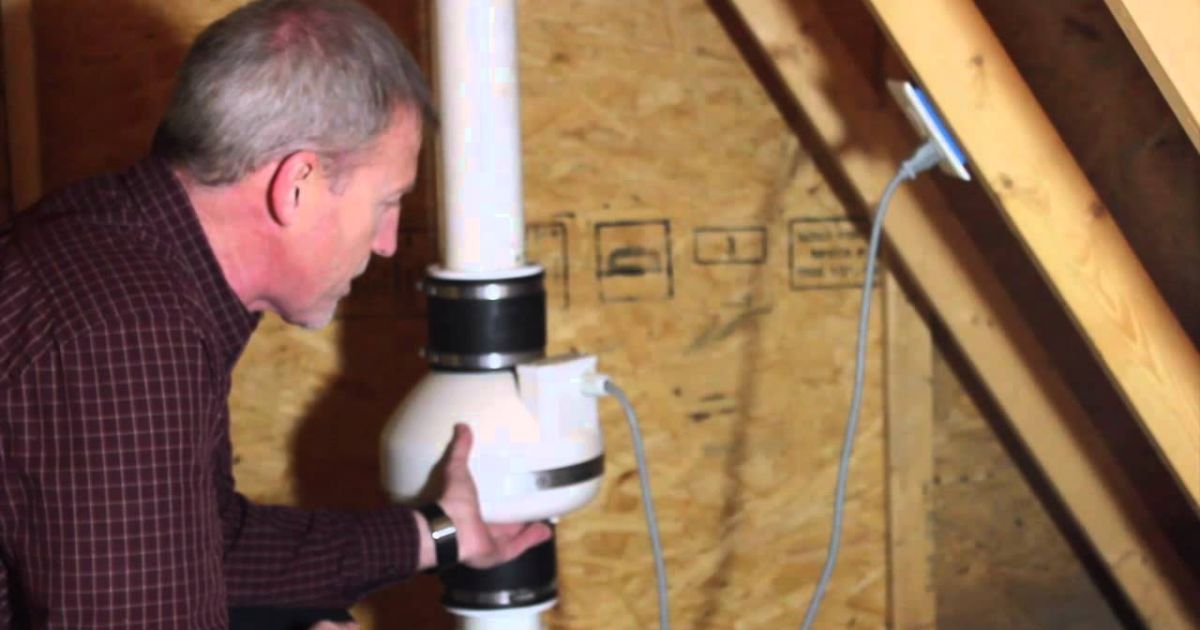
Connecting the Radon Mitigation System to Your Drainage System
The integration of the radon mitigation system with your drainage system is a crucial step in ensuring the effective removal of radon gas from your home. By connecting the radon mitigation system to your drainage system, you create a pathway for the radon gas to be safely expelled from your property. This is achieved by installing a PVC pipe that extends from the mitigation system to the drainage system. The pipe should be sealed tightly to prevent any leaks or escape of radon gas. It is important to ensure that the connection is secure and properly sealed to maintain the efficiency of the radon mitigation system. Once the connection is established, you can proceed to the next step, which is testing and monitoring the radon levels in your home.
Testing and Monitoring the Radon Levels
After connecting the radon mitigation system to your drainage system, the next step in ensuring the effectiveness of the system is testing and monitoring the radon levels in your home. Radon is a colorless and odorless gas that can seep into your home through cracks in the foundation or other openings. It is a known carcinogen and prolonged exposure to high levels of radon can increase the risk of lung cancer. Regular testing is crucial to determine if the radon mitigation system is effectively reducing the radon levels in your home. There are various testing methods available, including short-term and long-term tests. Short-term tests are typically conducted for a few days to a week, while long-term tests can span several months. It is recommended to perform both types of tests to ensure accurate results. Monitoring the radon levels in your home on an ongoing basis is also important, especially if your area is known to have high radon levels. This can be done using electronic radon monitors or by sending samples to a certified laboratory for analysis. By regularly testing and monitoring the radon levels in your home, you can ensure the effectiveness of your radon mitigation system and protect yourself and your family from the health risks associated with radon exposure.
Maintaining and Troubleshooting the Radon Mitigation System
- One important aspect of maintaining and troubleshooting the radon mitigation system is conducting regular inspections. Regular inspections ensure that the system is functioning properly and effectively reducing radon levels. During inspections, professionals check all components of the system, including the fan, piping, and venting. They assess for any signs of damage, blockages, or leaks that may compromise the system’s performance. Additionally, inspections involve testing the system’s pressure levels to ensure proper airflow and suction. Regular maintenance is also essential for the longevity of the system. This includes cleaning or replacing air filters, lubricating moving parts, and checking electrical connections. By conducting regular inspections and maintenance, homeowners can ensure the ongoing effectiveness of their radon mitigation system and the safety of their indoor environment.
Frequently Asked Questions
What Is the Average Cost of Replacing a Sump Pump With a Radon Mitigation System?
The average cost of replacing a sump pump with a radon mitigation system depends on various factors, such as the size of the area, complexity of the installation, and location. Professional assessment and quotes are recommended for accurate cost estimates.
Can I Install a Radon Mitigation System Without Removing the Existing Sump Pump?
Installing a radon mitigation system without removing the existing sump pump is possible, but it requires careful planning and expertise. By employing specialized techniques and equipment, professionals can effectively address radon concerns while preserving the functionality of the sump pump.
Are There Any Health Risks Associated With Radon Exposure?
Radon exposure poses significant health risks, including an increased risk of lung cancer. It is a colorless and odorless gas that can seep into homes through cracks and openings, and mitigation systems are essential for reducing these risks.
How Often Should I Test the Radon Levels in My Home After Installing the Mitigation System?
After installing a radon mitigation system, it is recommended to test the radon levels in your home every 2 years to ensure the system is effectively reducing radon levels and maintaining a safe environment.
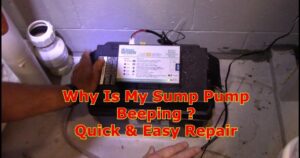
What Are Some Common Signs of a Malfunctioning Radon Mitigation System?
Some common signs of a malfunctioning radon mitigation system include increased radon levels, water intrusion in the system, noisy operation, and a decrease in system efficiency. It is important to address these issues promptly to ensure effective radon reduction.
Conclusion
In conclusion, replacing a sump pump with a radon mitigation system is a technical process that requires careful assessment, proper tools, and precise installation. By connecting the mitigation system to the drainage system, homeowners can effectively reduce radon levels in their homes. Regular testing and maintenance are crucial for ensuring the system’s effectiveness. With this solution in place, homeowners can have peace of mind knowing that they are taking necessary steps to protect their health and well-being.